Ayyıldız2 | 2008 TR Yapısı • 1-99 Orta Emek Destan • Oto Avsız • 10 Temmuz 21:00 HEMEN TIKLA!
Dersimize başlayalım ")
Create a new document
Yeni döküman yaratın.
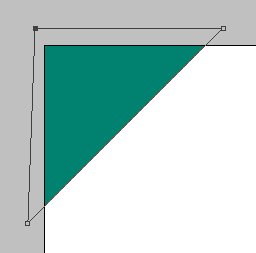
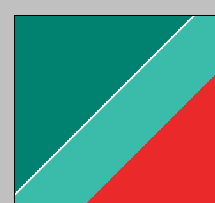
Set your foreground colour to #018270. Draw a shape the same as below to get perfect 45 degree angles when drawing with the pen tool hold down shift and click at what you think is 45 degrees and it will make it straight.
Foreground coloru #018270 olarak ayarlayın. 45 derecelik açılarla şekiller yaratacağız. Tam 45 dereceye ulaşmak için Pen tool seçili iken Shifte basılı tutun. 45 derecelik açılarla hatasız çizimler yaratmanıza yardımcı olacaktır.
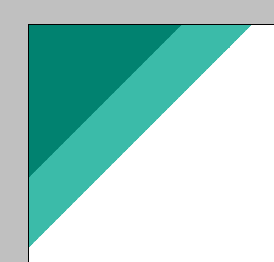
#3bbba9
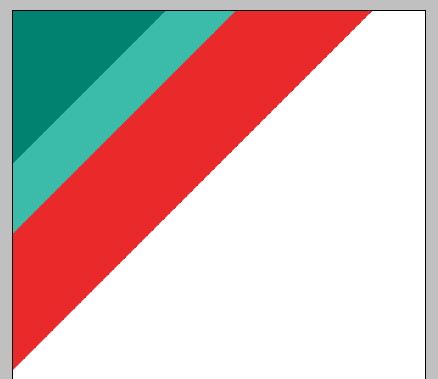
#ea2a2a
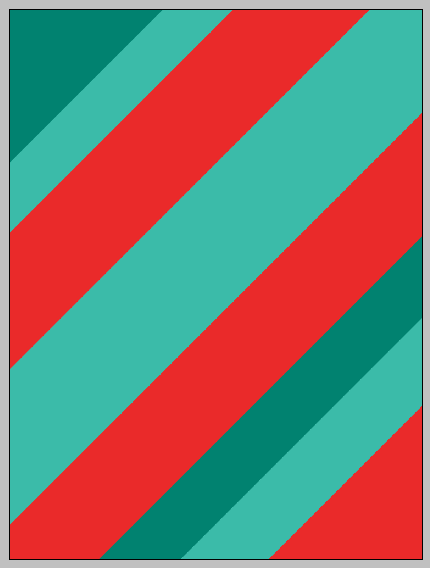
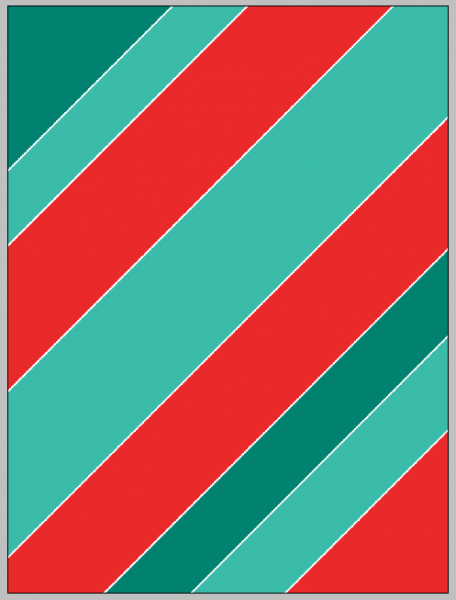
shape to bring up the blending options menu, from here select the stroke at the bottom and make sure the colour is set to white (#FFFFFF) and leave the size at 3px
Blending optionstan Strokeyi seçin. 3 pxlik beyaz (#ffffff koordinatlarında) bir çerçeve yaratın.
Shape in the layers tab and choose the option Copy Layer Style and then right click each of the other shapes and choose Paste Layer style.
Layera sağ tıklayın. Copy layer style ile kopyalayıp diğer layerlara paste layer style ile dağıtın.
We are going to add a background texture to the shapes to do this grab hold of thıs texture and copy and paste it into your current document and resize and position so that you are happy with it, when you are happy press CTRL + SHIFT + U to desaturate the layer
bu dokuyu dökümana aktarın yahut keyfekeder bir dokuyu kullanın. Renkli dokularınızı Ctrl-Shift-U ile desaturate ile renksizleştirerek kullanın.
not:
dokuya burdan sahip olabilirsiniz :

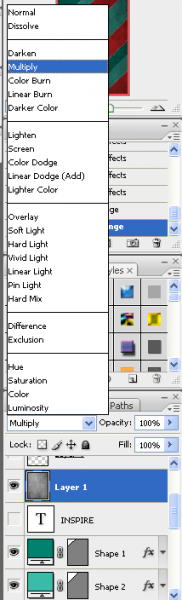
Change blend mode to Multiply.
Blend modu Multiply olarak değişin.
I have added the text RETRO all in capital letters this is so that it corresponds with the effect we are going for, the text . Can be found here when you have the text added to the centre of the document you should have something like this:
alttan fontu edinin. Merkeze RETRO yahut ta farklı bir kelime yazın.
not:
font :

We are going to modify the text by making the letter T and the first letter R longer, to do this grab the rectangular marquee tool and make a selection the same as below:
R ve T harflerinin tabanlarını Rectangular marquee tool ile seçili alan içine alın.

Resize with Free transform (Ctrl+T). When these are done you will have the same as below:
Free Transform (Ctrl-T) ile tabanı aşağıya doğru uzatın.

This step is simple as all you need to do is to download these Retro brushes. Use the below image as a reference to what brushes to add where:
alttan brushu edinin. Aşağıdaki yahut ta kafanıza göre bu brushu kullanın. Renk uyumsuzluğu olmaması için foreground colorun beyaz olduğuna dikkat edin.
not :
brush :

We need to group all of the layers that make up the text so select the layers by CTRL + Clicking them individually in the layers tab and the right click and choose Merge Layers
Ctrl eşliğinde layer penceresinde layerların yazı kısmına tıklayın. Bu sayede bir kaç layerı aynı anda seçebileceksiniz. Background haricindeki tüm layerlar seçili iken sağ tuş ile Merge Layersı tercih edin.
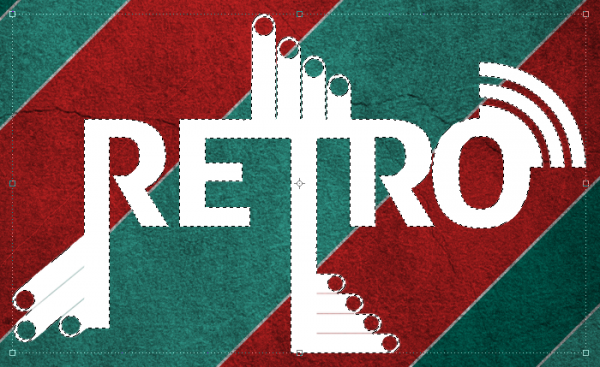
CTRL + Click the box next to the layer in the layers tab which will select all of the outside and you should see the crawling ants like below:
Ctrl eşliğinde birleştirdiğimiz layerın resim kısmına tıklayın. Yazı ve şekillerimizin seçili olduğunu göreceksiniz.
Select > Modify > Expand
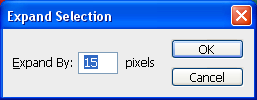
You have this selection create a new layer (CTRL + SHIFT + N) and then pick the Fill Tool and fill the selection with the colour #4c2222 you will then have the below:
Ctlr-+Shift+N ile yeni bir layer yaratın. Fill Tool ile seçili alanı #4c2222 rengi ile doldurun. Layerı birleşik layerın altına çekin.

We are going to add a texture/pattern to the background we have just created for the text, to do this grab hold of thıs pattern and copy and paste it into your poster and position it over you background .
alttan patterni edinin. Kopyala yapıştır şeklinde tüm ekrana yayın.
not :
pattern :
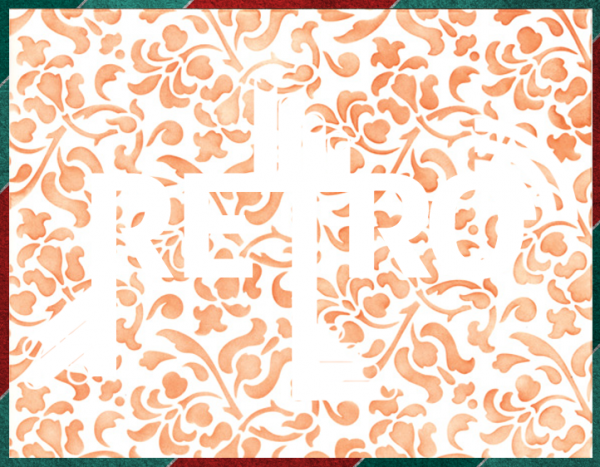
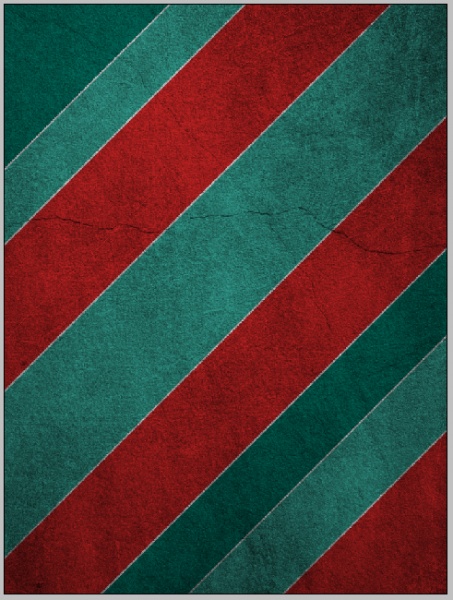
set the layer style to Color Burn this will then get rid of the white from the image and darken the remaining colour, now place the grunge texture above all of your other layers so that it is applied to all the layers this will then leave you with the finished poster:
Patternin blend modunu Color Burn olarak değişin. Yazı layerını duvar dokusunun altına yerleştirdiğinizde nefes kesen sonuç ile karşılaşacaksınız.

Create a new document
Yeni döküman yaratın.
Set your foreground colour to #018270. Draw a shape the same as below to get perfect 45 degree angles when drawing with the pen tool hold down shift and click at what you think is 45 degrees and it will make it straight.
Foreground coloru #018270 olarak ayarlayın. 45 derecelik açılarla şekiller yaratacağız. Tam 45 dereceye ulaşmak için Pen tool seçili iken Shifte basılı tutun. 45 derecelik açılarla hatasız çizimler yaratmanıza yardımcı olacaktır.
#3bbba9
#ea2a2a
shape to bring up the blending options menu, from here select the stroke at the bottom and make sure the colour is set to white (#FFFFFF) and leave the size at 3px
Blending optionstan Strokeyi seçin. 3 pxlik beyaz (#ffffff koordinatlarında) bir çerçeve yaratın.
Shape in the layers tab and choose the option Copy Layer Style and then right click each of the other shapes and choose Paste Layer style.
Layera sağ tıklayın. Copy layer style ile kopyalayıp diğer layerlara paste layer style ile dağıtın.
We are going to add a background texture to the shapes to do this grab hold of thıs texture and copy and paste it into your current document and resize and position so that you are happy with it, when you are happy press CTRL + SHIFT + U to desaturate the layer
bu dokuyu dökümana aktarın yahut keyfekeder bir dokuyu kullanın. Renkli dokularınızı Ctrl-Shift-U ile desaturate ile renksizleştirerek kullanın.
not:
dokuya burdan sahip olabilirsiniz :
Change blend mode to Multiply.
Blend modu Multiply olarak değişin.
I have added the text RETRO all in capital letters this is so that it corresponds with the effect we are going for, the text . Can be found here when you have the text added to the centre of the document you should have something like this:
alttan fontu edinin. Merkeze RETRO yahut ta farklı bir kelime yazın.
not:
font :
Linkleri görebilmek için Turkmmo Forumuna ÜYE olmanız gerekmektedir.
We are going to modify the text by making the letter T and the first letter R longer, to do this grab the rectangular marquee tool and make a selection the same as below:
R ve T harflerinin tabanlarını Rectangular marquee tool ile seçili alan içine alın.
Resize with Free transform (Ctrl+T). When these are done you will have the same as below:
Free Transform (Ctrl-T) ile tabanı aşağıya doğru uzatın.
This step is simple as all you need to do is to download these Retro brushes. Use the below image as a reference to what brushes to add where:
alttan brushu edinin. Aşağıdaki yahut ta kafanıza göre bu brushu kullanın. Renk uyumsuzluğu olmaması için foreground colorun beyaz olduğuna dikkat edin.
not :
brush :
Linkleri görebilmek için Turkmmo Forumuna ÜYE olmanız gerekmektedir.
We need to group all of the layers that make up the text so select the layers by CTRL + Clicking them individually in the layers tab and the right click and choose Merge Layers
Ctrl eşliğinde layer penceresinde layerların yazı kısmına tıklayın. Bu sayede bir kaç layerı aynı anda seçebileceksiniz. Background haricindeki tüm layerlar seçili iken sağ tuş ile Merge Layersı tercih edin.
CTRL + Click the box next to the layer in the layers tab which will select all of the outside and you should see the crawling ants like below:
Ctrl eşliğinde birleştirdiğimiz layerın resim kısmına tıklayın. Yazı ve şekillerimizin seçili olduğunu göreceksiniz.
Select > Modify > Expand
You have this selection create a new layer (CTRL + SHIFT + N) and then pick the Fill Tool and fill the selection with the colour #4c2222 you will then have the below:
Ctlr-+Shift+N ile yeni bir layer yaratın. Fill Tool ile seçili alanı #4c2222 rengi ile doldurun. Layerı birleşik layerın altına çekin.
We are going to add a texture/pattern to the background we have just created for the text, to do this grab hold of thıs pattern and copy and paste it into your poster and position it over you background .
alttan patterni edinin. Kopyala yapıştır şeklinde tüm ekrana yayın.
not :
pattern :
Linkleri görebilmek için Turkmmo Forumuna ÜYE olmanız gerekmektedir.
set the layer style to Color Burn this will then get rid of the white from the image and darken the remaining colour, now place the grunge texture above all of your other layers so that it is applied to all the layers this will then leave you with the finished poster:
Patternin blend modunu Color Burn olarak değişin. Yazı layerını duvar dokusunun altına yerleştirdiğinizde nefes kesen sonuç ile karşılaşacaksınız.

Şu an konuyu görüntüleyenler (Toplam : 0, Üye: 0, Misafir: 0)
Benzer konular
- Cevaplar
- 3
- Görüntüleme
- 147
- 5.00 yıldız(lar) 1 Değerlendirme
- Cevaplar
- 3
- Görüntüleme
- 108
- Cevaplar
- 4
- Görüntüleme
- 104